Thursday, July 26, 2012

Raspberry Pie Bars

Dessert.  Raspberries.  Butter.  More butter.

Words that make me smile.  Yah, this recipe is a keeper.  :)

The ingredients that have caused me to be loopy with butter and giddiness.  You're not seeing things.  That is three sticks of butter.  If you're trying to lose any amount of weight, you probably just need to click outta this recipe right now and head back to Pinterest in search of some lower fat recipes.


Mix the all-purpose flour, sugar and salt in a bowl.  Then go and take a blurry picture of it for your blog.  Combine well.


This is the crazy part.  The recipe called for you to get your food processor out and cut the butter into it that way.  I was too lazy to retrieve my processor out of the lower cupboards, so I used my pastry cutter.  To cut in THREE STICKS OF BUTTER.  Um, not so lazy after all.  I got a good workout in.  Something's not right in my head.  But if you do really wanna talk about lazy, I abhor washing those pastry cutters after they're all filled up with greasy butter.  


Reserve 1 1/2 cups of the crumbled up goods for the topping.  Grease a 9x13 pan.  Take the flour/butter mixture and press into the bottom of the pan.  Make a nice thick crust.  

Those fingerprints kinda freak me out a bit.  


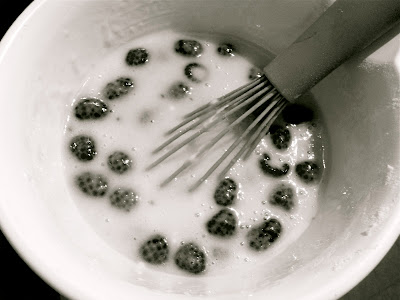
Whisk 4 eggs together.  Action shot.


Add your sugar, sour cream, flour, salt, lemon zest and almond extract and stir until combined.


Fold in raspberries.


Remember the goods?  Well, now just take what you have left and sprinkle all over the top of the berry mixture.  Go heavy.  :)


Yum.  Yum.  Yum.

Hot from the oven.  You notice the recipe calls for bars.  I just couldn't wait that long.  So, I had some scoops with some more scoops of vanilla bean ice cream.  


I'm fat and happy.  It's been a long day though so I deserve a second helping.

You'll want one too.

Star Rating: 

Raspberry Pie Bars

Crust and Topping

  • 3 cups all-purpose flour
  • 1 1/2 cups sugar
  • 1/4 tsp salt
  • 1 1/2 cups (3 sticks) unsalted butter, chilled
Fruit Filling

  • 4 large eggs
  • 2 cups sugar
  • 1 cup sour cream
  • 3/4 cup flour
  • pinch salt
  • zest of 1/2 lemon
  • 1 tsp almond extract
  • 2 (16-oz) packages fresh raspberries, thawed and drained
To make the crust and topping, preheat the oven to 350 degrees.  Grease a 9x13 inch baking pan. 

Combine the flour, sugar, and salt in the bowl of a food processor.  Pulse a few times to mix.  Cut the butter into 1/2-inch cubes, and add to the flour mixture.  Process until the butter is evenly distributed but the mixture is still crumbly, 30-60 seconds.

Reserve 1 1/2 cups of the mixture to use as the topping.  Press the remaining mixture into the bottom of the pan, and bake 12-15 minutes.  Cool for at least 10 minutes.

To make the filling, whisk the eggs in a large bowl, then add the sugar, sour cream, flour, salt, lemon zest, and almond extract.  Gently fold in the berries and spoon the mixture over the crust.  Sprinkle the remaining flour mixture evenly over the filling, and bake 45 to 55 minutes.

Cool at least 1 hour before cutting into bars, or scoop out of the pan to serve cobbler-style.

Wednesday, July 25, 2012

Glorious Chicken ~ With FOUR Main Ingredients

I don't know about you, but I love changing things up when it comes to the menu.  I am the queen at trying new things.  And most of the time, I'm not disappointed.  For the first year or two of our marriage, I cooked something new almost every night.  I can think of 2 things I've made since that time that we didn't couldn't eat.  That bad.  One was a turkey meatloaf (just threw up a little in my throat) that never set up.  And the other was a Thai Peanut Chicken dish (oohh, shiver).  I steer clear of Thai now - people or food.

Totally kidding.

This chicken got R.A.V.I.N.G reviews online, and hellllo - it only required four main ingredients.  FOUR.  4.  Quatro.  Ya better believe it's one I would try.  Super easy, few ingredients and tastaaayyy.  Not many recipes fall under those categories.  Oh man, am I glad I tried it!!

Here's the small ensemble.  Small ensembles are overrated, everywhere.  From recipes to just singing in a group.  I love 'em.


Lay chicken in a 9x13 dish.  Ground some fresh peppercorn pepper and sea salt over the chicken to your liking.  


Mix 1/2 cup of Dijon mustard, 1/4 cup pure maple syrup and 1 tablespoon of red wine vinegar together.  The pure syrup is like $8 bucks a bottle.  I'm not sure how the cheaper stuff would work out.

To do list: stop biting nails and get a manicure.  Nasties.


Pour mixture over prepared chicken.

Isn't this incredibly hard work?


If you'd like a torching of your eyebrows, open oven and take a picture of your chicken baking.  Wow, 450 degrees is hot stuff.


Bake for 40-45 minutes.  Once done, sprinkle rosemary on top.  Or don't.  It's good either way.  It's so tender, you can cut it with a spoon.  Which yes, I did.  My fork was overtaken by my toddler.

Put on a plate with green beans from your garden and buttery, red potatoes and chow down.


Star Rating: ★ (sighhh, got carried away.)
Thanks, Rachel and whoever you got it from. You have changed my life.

RECIPE: Glorious Chicken

Ingredients:
4 boneless, skinless chicken breasts
1/2 C. Dijon mustard
1/4 C. pure maple syrup
1 T. red wine vinegar
Salt
Pepper
Rosemary

Instructions:
Lay trimmed chicken breasts in baking dish.  Salt and pepper to your liking.  Mix the Dijon mustard, maple syrup and red wine vinegar together.  Poor over chicken.  Bake at 450 for 40 minutes.  Sprinkle rosemary on chicken before serving.


Saturday, July 21, 2012

Soup & Salad Night ~ Zuppa Toscana, Baby!

Presentation of food is a big thing to me.  It obviously isn't everything, but apparently, it really helps with ignorant eaters.  If it looks fantabulous, then it's the best they've ever experienced.  Which I can handle.

I love making my food look pretty.  Satisfies something way down deep in me.  I promise I'm not that much of a freak.  Just sounds like it.  A lot.

A tidbit for those that would like to impress for less - find a dish that looks like you've already knocked it outta the park.  Good chance, when your peeps bite into it, you'll already have them hooked by the way of them just admiring your beautifully prepared food.

Tonight was a simple soup & salad night.  Who doesn't love that combo?  My suggestion for your next soup/salad menu - go with the following and you will not be disappointed.

Olive Garden's Zuppa Toscana and a Cobb Salad.


For the salad, grab what you love and assemble it like so on a bed of leaf lettuce and romaine hearts.  I had chicken, boiled eggs, grape tomatoes, avocado, shredded mozzarella and bacon.  You can do a tasty balsamic vinaigrette (which takes just a couple more minutes to whip up) or you can stick with Peppercorn Ranch like we did tonight.  Actually that soup was just begging to be eaten, and I didn't want to spend a mere second longer in the kitchen.

The Zuppa Toscana was AHHHH (singing a high C kinda ahhhhh)!  I adapted the recipe slightly.  Definitely could have eaten a couple more bowls.  Even my 2-year old was slurping the last bits of his second bowl out like he hadn't eaten in several days...which in reality, he had just consumed three waffles with preserves moments before dinner.  More waffles than any one person should probably consume in a week.  Let alone, one afternoon.

Let me say this to protect myself.  If you are looking for the exact recipe for Olive Garden's soup, this will not be the exact depending on the type of Italian sausage you buy.  The exactness is probably determined by the spiceyness, but I loved this.  Enough of the exact-ic-ities. ;)

Recipe for the soup.  Here you go.

Star Rating: 

RECIPE: Olive Garden's Zuppa Toscana
Adapted from Pastry Affair

1 lb. Italian sausage
1 tea. paprika
1 white onion, chopped
2 tea. garlic, minced
8-10 C. chicken broth
Red pepper flakes, optional (I only put a dash or two to spice things up a bit.) 
4-5 Russet potatoes, sliced 1/4" thin
1 C. heavy whipping cream
2-3 C. kale
Salt and pepper to taste
Freshly grated parmesan for topping

Instructions:
Brown sausage with paprika.  Once cooked, move sausage to another bowl and drain excess fat.  Set aside.  
Use the same pan.  Add onions and garlic and cook to soften, about 10 minutes.  Pour in chicken broth and bring to a boil.  Add sliced potatoes and simmer until they are softened, about 25-30 minutes.  Add heavy whipping cream, kale and sausage.  Cook until thoroughly heated.  Garnish with parmesan.

Indulge.  In at least 4 bowls.  It's almost fat-free.


UPDATE: Those of you who don't get me - that last line was a total falsehood.  TOTAL.  


Thursday, July 19, 2012

Cinnamon Toast Blueberry Bakes

Back from vacation.  Again.  :)  Is it possible to be vacationed-out?  Yeaaa...probably not.

What better way to start up again than with a recipe of a very easy, sweet, mouth-watering breakfast dish.  

Tips: 1. Use a large bowl if your child will be helping.  You'd be amazed at how far bread can be tossed by vigorous stirring.  2. Feed him before he starts to help because if not, he'll eat most of everything he's mixing.  3. Don't let these cool down too much before consuming.  The steamy juices are aaahhhmazing. 4.  Special order 16-oz. ramekins if they are on the market.  These 8-oz. ones are a joke, unless you're 2 years old.

Thanks, Taste of Home.

Star Rating: 


RECIPE: Cinnamon Toast Blueberry Bakes


4 slices whole wheat bread, cut into 1/2" pieces
6 T melted butter
3 T sugar
1/2 tsp. ground cinnamon
1 C. fresh blueberries
1/4 C. packed brown sugar
2 tsp. lemon juice


Instructions:
Place cut up bread in a large bowl.  Combine the butter, sugar and cinnamon and drizzle over bread.  Toss to coat.  Combine the last 3 ingredients in a separate bowl.
Place half of the bread mixture into 4 8-oz. ramekins.  Layer with the blueberry mixture and remaining bread.  Bake, uncovered, at 350 for 15-20 minutes or until crisp and heated through.


Tuesday, July 3, 2012

Delicious Whenever Rolls

If you look at my food posts thus far, you notice one wonderful similarity.  Carbohydrates.  Starch + Me = HEAVENLY TIMES.  Sorry, but tis true.

Normally, I'm just lazy when it comes to "making" bread and I'll use the bread machine to either mix up dough or allow it to do all of the work.  It does wonders, and I'm satisfied with that.  Yet, when I saw this on Pinterest yesterday, I knew I had to try my hand at these scrumptious pieces of art.

This is the cast (plus salt. He was somehow missing when the picture was taken.). 
Oh, and that silly piece of paper will be explained later.

First off, measure 1 1/2 cups of milk in a microwavable dish.  Add 3/4 cup sugar and 1/2 cup butter (oh yeah!).  Scald that real good.  My microwave has been messed with by my dear toddler so much that I haven't the slightest clue what power level it's on.  So a good 3 minutes did the trick.

In a separate bowl, combine 2 cups warm water, 1 tablespoon of sugar and 2 tablespoons of active yeast.  As opposed to non-active yeast.  Derr.  Allow it to do its bubbly thing for awhile. 

Meanwhile, to cool your milk/butter/sugar mixture down so it won't kill your yeast, add 1-2 cups of flour (I did only one) and 1 egg with a tablespoon of salt to the bowl.  The milk mixture needs to be warm, not boiling.
*THERE'S THAT SALT.  He gets his moment of fame after all.*

Once everyone involved is happy with the temps of both mixtures, combine them.  Oooo, bubblies, bubblies.  I love them.

Learn from my mistakes.  Since this recipe makes approximately 532 dinner rolls, go find yourself a gargantuan bowl.  Get your spankstick wooden spoon out and start adding in the flour by 2 cups at a time.  In the end, you will have added 9-10 cups (including that which was already added to the milk mixture).  Don't add too much flour.  Never a good result.  And don't go lazy on me.  Mix by hand.  You and everyone else that consumes these will thank me later.

Once you've emptied a near full bag of flour into your bowl, you will notice it gets tough to stir - sticky.  You might need to use your hands (OH, BOY!!) to add the rest of the flour in.  It kneads it.  It's fun.  It's messy.  So why not?  

Once the mixing is mastered, smooth dough and cover with plastic wrap.  I always spray my plastic wrap with butter spray so it doesn't stick as much.  If you'll take a moment to notice the huge spot of buttery spray, that would be due to my little helper.  He was having too much fun to heed my "stop," immediately.  That spot was extra easy to get off.  :)

Let it double in size or whatever this is.  I had to get in there hastily.  My yeast was having some good times - did not take long to get this big.

Divide dough into 4 sections.  I thought it funny that the original recipe said to lift each one and see if they all weigh the same.  Uhh yeah, I didn't do that.  Pretty sure I'm good enough just to look at the blobs to see if they're equal.  Decent job on my part, eh?  

Roll that goodness out.  Look at those precious little hands.  Pictures to cherish.
Each section should yield 12 rolls.

Once it's all rolled out, butter the whole dough surface.  Approximately 2 tablespoons of butter will be used on each circle.

It's a tad easier if you cut the dough into 4 pieces initially...then each section gets divided into 3 pieces.  Once you're done, you will have scads of rolls.  A total of 48.


Remember that piece of paper with the awful handwriting on it?  Wellll, the original "Pinner" had found this cute Thanksgiving idea where she wrote down things she was thankful for and then made "fortune rolls" by inserting these papers into each roll.  I'm a thankful individual.  But, I'll be lots more thankful when I can lose those last few pounds that will NOT leave my body.  SOOO, I did this instead. :)  If you noticed on my sheet, I did include several "Freebies" along with other variable means of torture.  So not every time I eat a roll do I need to drop it like's it hot and start exercising.  

I will not disclose how many rolls I have eaten in the past 24 hours.  But, I have done an extensive amount of exercise to make up for my sinful deeds.  I mean, I did HAVE to keep eating the rolls in order to find my "Freebies."  :) 

Ok, back to the recipe.  Where were we???  Yah, roll those rolls up and let them raise.  Or rise.  Whatever.
BEAUTIFULness.

 Fresh out of the oven.  Do you know what's worse than waiting for buttery rolls to cool down so you can taste them?  NOTHING.  Hence, the burn marks on the roof of my mouth and tongue.  Oh, but it was worth it.  SOO worth it. 

Grab some more butter and rub it all over the hot mess.  

Each member of my household has said they were really yummy.  Mr. B said they were the best ever.  At least, I think he did.  Let's go with it! :)

Now, who wants to just eat these at dinner?  Not me nor anyone else with a brain.  Or a healthy stomach.  So we have them whenever we get the chance.  Like today.  For lunch.  Dab some egg salad on there with some crunchy leaf lettuce and you've got yourself another winner.

Star Rating: 

RECIPE: Delicious Buttery Dinner Rolls

Ingredients:
1 1/2 cups of milk
3/4 cup + 1 T sugar
1 egg
1 T salt
2 T yeast
2 cups of warm water
About 9-10 cups of all-purpose flour
At least 1 cup of butter

Directions:
Scald 1 1/2 cups of milk, 3/4 cup sugar and 1/2 cup of butter in a microwave safe bowl, for about 2 minutes.  

Add yeast to this hot mixture, but it will be too hot to just dump the yeast straight in.  To cool it down, add 1 egg and 1 T of salt and leave it to cool for a couple of minutes.  Meanwhile, in a measuring cup, dissolve 2 T of yeast in 2 cups of warm water and 1 T of sugar.  Let it sit for a couple of minutes until bubbly.  You can stir in 1-2 cups of flour to the milk/butter mixture to cool it down further.  Make sure your milk mixture is just warm, not boiling and add the yeast mixture.

Using a fork or a wooden spoon, gradually stir in 9-10 cups of flour.  Recommend doing 2 cups at a time.  At the end, the dough will be dense and sticky, and may be hard to stir.  You can use your hands to incorporate the rest of the flour as needed.  Be sure not to add to much flour.  Then smooth the dough out and cover the bowl with plastic wrap.  Leave it in a warm place and let it rise.

Cover your working space with flour to prevent the dough from sticking.  Dump your dough out and divide it into 4 balls.  Eyeball the sizes.  Using one ball of dough at a time, roll the dough into a circle on a floured counter.  Once it's rolled out, spread the top with soft butter from edge to edge.  You will use about 2 T per circle of dough.

Cut the dough into quarters using a pizza cutter.  Then cut each quarter into 3 pieces.  You should get 12 pieces out of each circle - a total of 48 rolls.  Roll each triangle starting with the wide end.  Tuck the tail of the triangle under the roll and place it on a buttered cookie sheet.  You will make 3 rows, with 8 rolls per row.  This will give you 24 rolls per pan.  Two balls of dough will fit 1 pan.  

Pre-heat your oven to 350 degrees.  Place the pans of rolls in a warm place (on top of the oven if possible) to let them rise.  Once they are touching and full in size, cook (one pan at a time) in the oven until they are golden brown.  About 10-15 minutes.  

While they are still hot, run a stick of butter over the tops of the rolls for a delicious buttery glaze.

ENJOY!